Not build related but if anyone is a regular reader, I will be changing the URL of this blog to try make it a bit more visible in Google. Despite mucking about with meta tags and other stuff, for some weird reason, my blog never appears in a search, even if you use the exact words of the current URL! Loads of other blogs appear - it's really annoying... Apologies for sounding like a prima Donna - this is more a practical thing because a couple of friends and family members keep asking me for the url of the blog (they seem incapable of using bookmarks) and I keep forgetting what it is. I'd like to be able to tell them to just Google it but that's just not working...
Anyway, thought I'd try changing the URL because there is an old blog with a very similar name that always appears on the first page of a Google search, despite the fact it's 5 years old and only has one post!!
So, new URL will be:
zerolife.blogspot.co.uk
UPDATE: that was taken - it is now:
zerolifebuild.blogspot.co.uk
(although, if you're reading this, you already know that - doh!)
I'll change this in a couple of days to give anyone time to read this post.
Also changed the blog template - hope you approve ☺
Sunday 26 February 2017
Tuesday 21 February 2017
Booti-ful
Well, the boot panels took me a little longer than I expected but, man, was it fun.
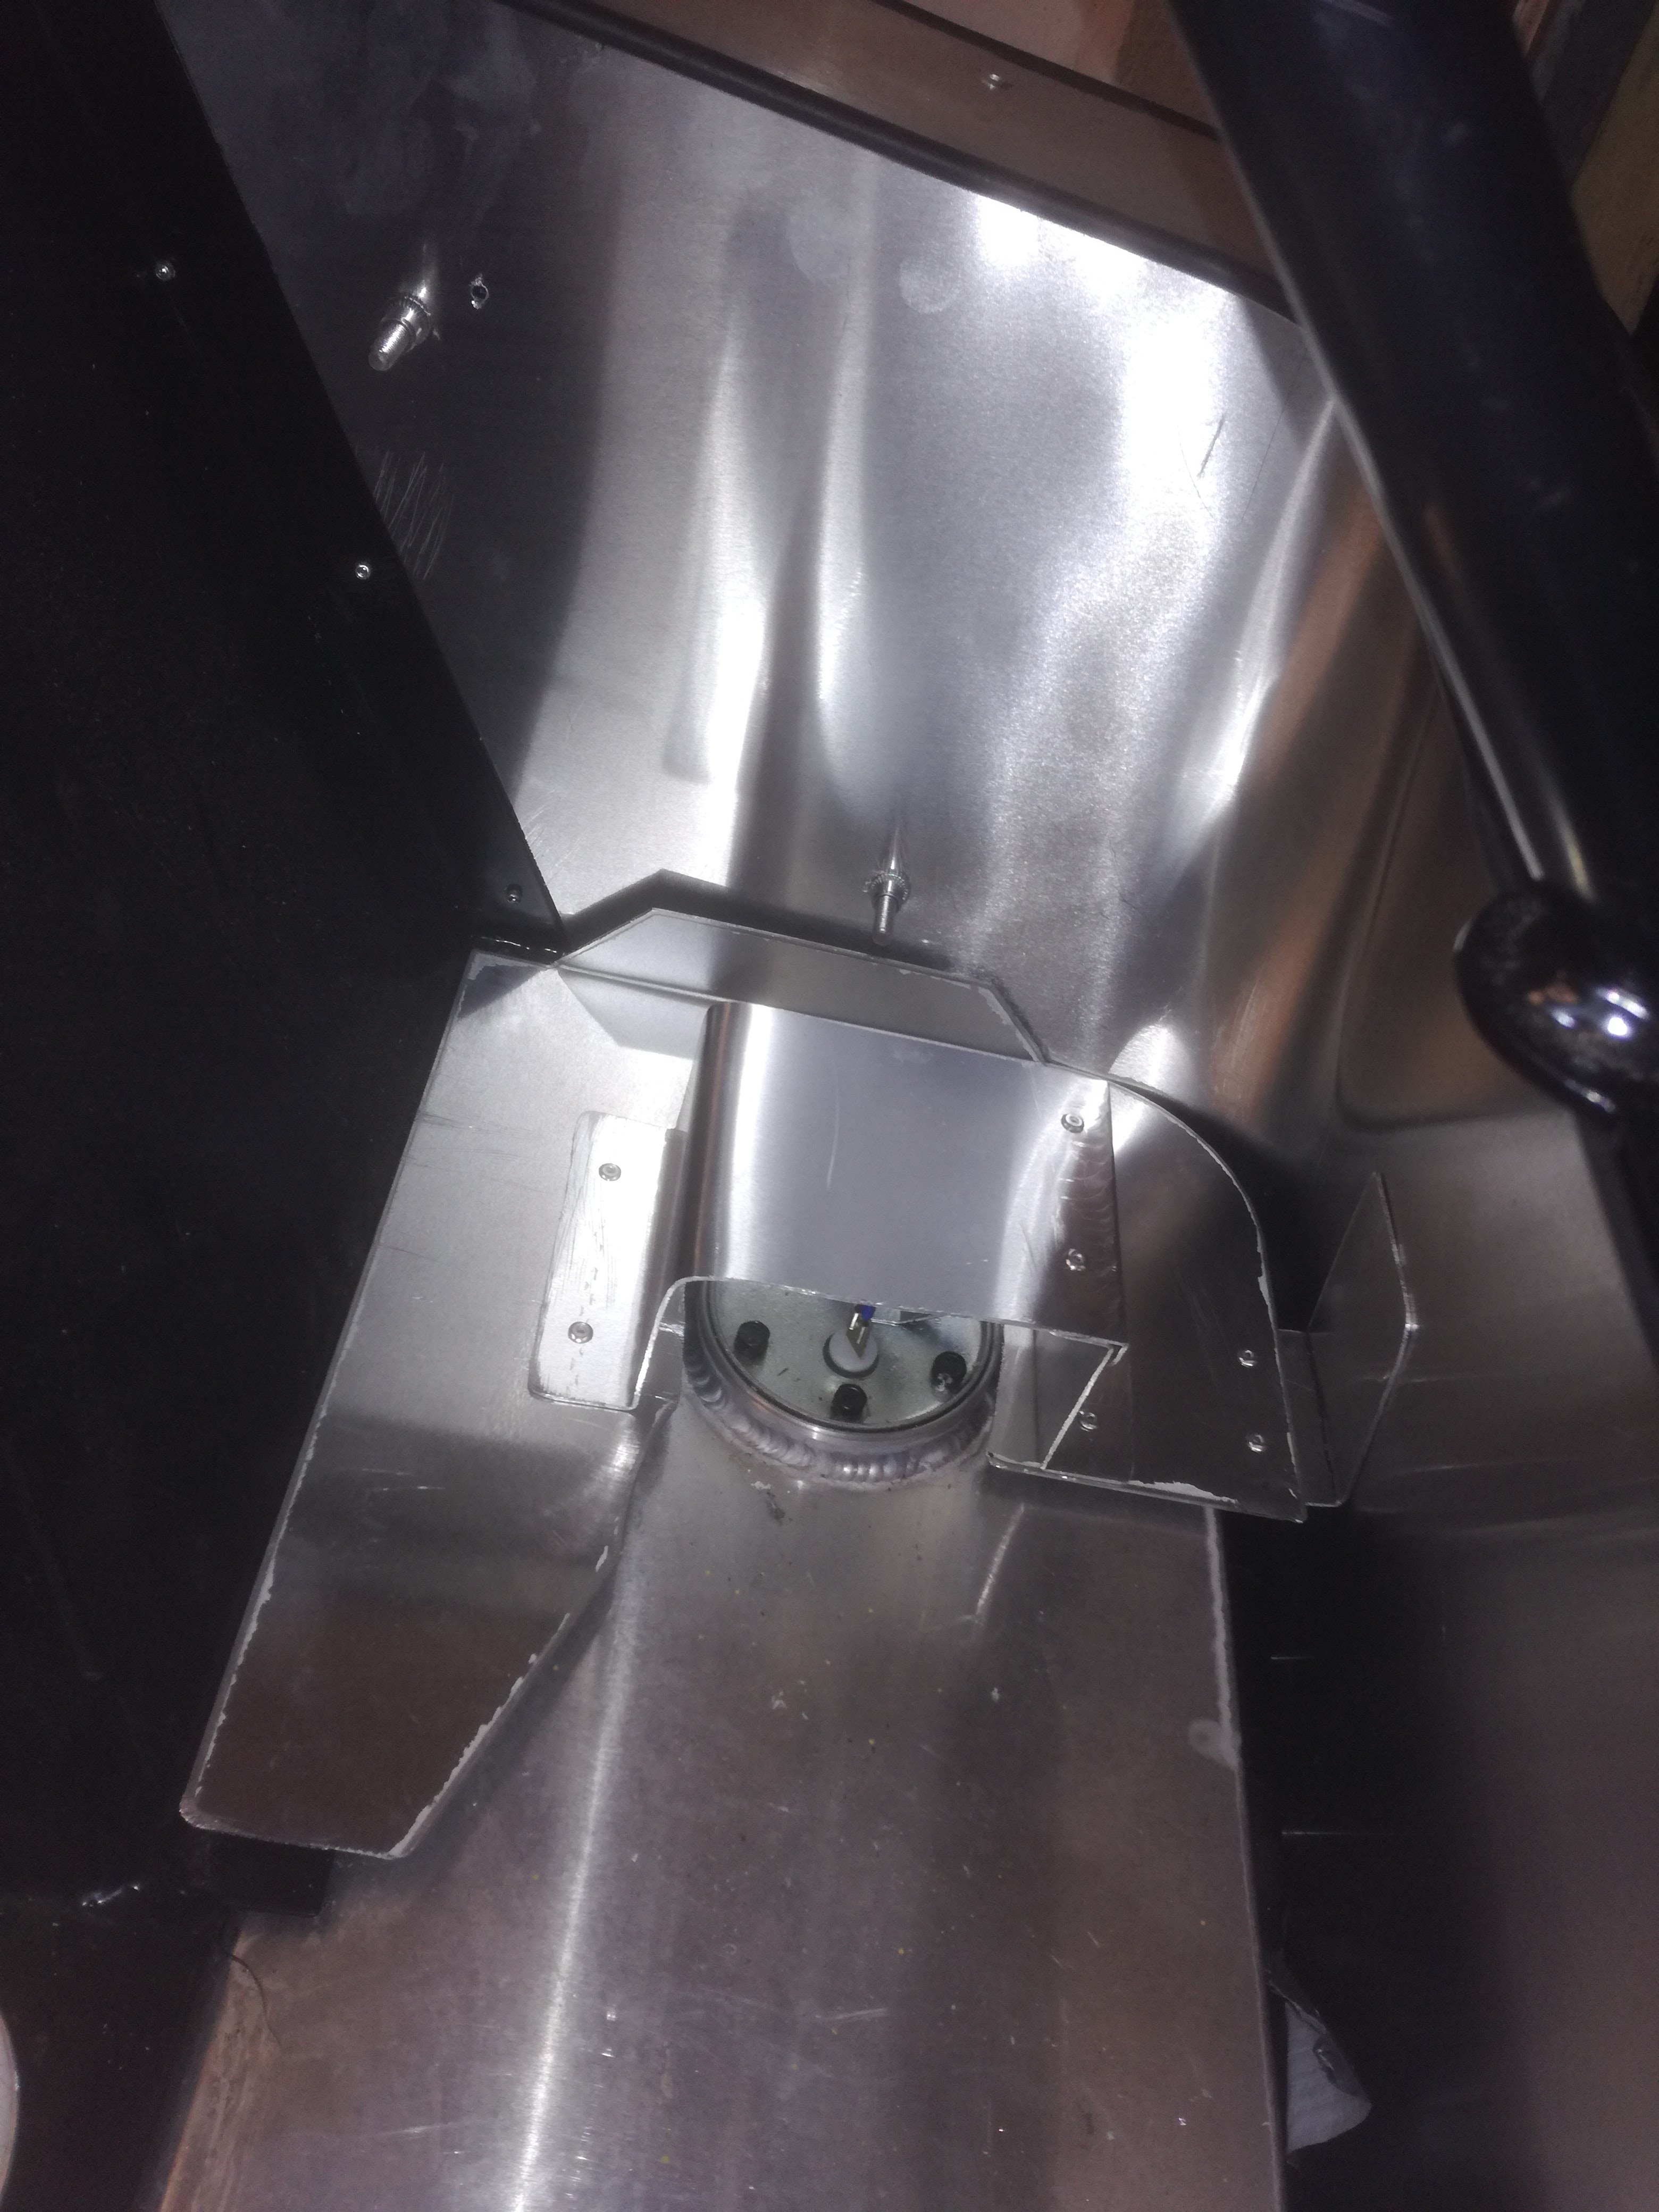
The left side was simple as the piece fitted with no work needed. However, the other side was more difficult. I guess GBS just make both pieces identical to save costs?
The piece on the right has to go round the fuel sender, so needs some cutting:

So far, so easy. Problem is that the wires for the fuel sender stick up and are vulnerable to anything moving round in the boot. So, with my amazing metalworking skills (?), I fashioned a little tent to protect the connections:


At this stage of my build, I'm running out of stuff so I had to use scraps to make the cover, hence the rivets you can see on the top to connect a couple of scraps. The tab on the right will be bonded to the rear panel.
Great fun to do and I think is very useful.
The left side was simple as the piece fitted with no work needed. However, the other side was more difficult. I guess GBS just make both pieces identical to save costs?
The piece on the right has to go round the fuel sender, so needs some cutting:

So far, so easy. Problem is that the wires for the fuel sender stick up and are vulnerable to anything moving round in the boot. So, with my amazing metalworking skills (?), I fashioned a little tent to protect the connections:

At this stage of my build, I'm running out of stuff so I had to use scraps to make the cover, hence the rivets you can see on the top to connect a couple of scraps. The tab on the right will be bonded to the rear panel.
Great fun to do and I think is very useful.
Sunday 19 February 2017
Bling
Short session today to finish off the ECU map switch:

Will need to add a wire into the ECU plug and a short connection to earth and done.
I wanted to add some labels to the panel but I can't find the sticker sheet I bought months ago.
Couple of other minor jobs; a bit of small rubber trim to the front edge of the scuttle which makes it look 100 times better and some proper bling in the form of chrome-look trim for the bonnet:

Again, looks really good...
Need to get my delivery of bits to finish off the headlight wiring so I can test it before final cable ties and general tidying up of them can be done.
Saturday 18 February 2017
The Big Thaw
Well, my loyal fans (!), it's been a while. To coincide with the coldest spell of the coldest winter I can recall, our boiler decided to take the opportunity to die - our house has been freezing and while I don't mind too much being in the garage in that temperature, coming in to a house which is almost as cold is not enjoyable. These are my pathetic reasons for doing no work for the last 2 weeks.
But boiler now fixed, heat restored and warmer weather here as well, I surged ahead.... er... sort of.
The wiring for the headlights is being a pain - the original wires just weren't long enough, resulting in the plug to the loom ending up right in the space where the suspension mount sits, which didn't seem like a good idea. So, I tried to extend them but I ran out of butt connectors and loom tape. One side done but the other waiting on a delivery.
I've decided to add an ECU map switch to the aux panel, so I can swap between an emission-friendly map and a normal road use map (bit like VW have been caught doing) on the fly, without having to connect the PC up.
It's a very simple setup; toggle switch connected between an earth and one of the pins on the ECU. The ECU can store 3 maps; with the switch in the off position, an internal pull-up resistor gives a 5V signal that tells the ECU to use map 3 and with the switch on, the ECU sees the earth (0V) and uses map 1 - nice. Just need to actually create some maps...
I've bought a simple toggle switch and a couple of guard hoops and started fitting - I'll get a pic next time.
Also ordered a Carling wiper switch to replace the rubbish CBS one.
Thursday 2 February 2017
It's gone a bit Pete
Well, my shroud was looking OK in bare metal and plastic but my vinyl covering skills have gone South for the winter and the final result looks, to be frank, crap.
Started by adding a piece of foam to try smooth out the shape:


(that mottled effect is supposed to make it look like alacantra/leather - yeah, I regret that buying choice).
Assuming it still fits on OK (I haven't tried it yet), it will have to do. Fortunately, there are no requirements at IVA for the shroud unless being fugly is a problem.
Finished off the front wheel arches by bonding in a cable tie holder in each one, to hold the indicator wiring in place.
Started by adding a piece of foam to try smooth out the shape:

... but not a good result:

(that mottled effect is supposed to make it look like alacantra/leather - yeah, I regret that buying choice).
Assuming it still fits on OK (I haven't tried it yet), it will have to do. Fortunately, there are no requirements at IVA for the shroud unless being fugly is a problem.
Finished off the front wheel arches by bonding in a cable tie holder in each one, to hold the indicator wiring in place.
Subscribe to:
Posts (Atom)